How to Schedule an Instagram Post: Account to Published Result
Choose your Instagram setup, connect the intended account, review your caption and media, and check the publishing result.
Author
If you want one Instagram post to go out later, first choose the account and tool you will use. Instagram’s own scheduling controls and a third-party scheduler have different connection requirements.
Choose your setup
- Instagram app: use the native scheduling controls when they are available to your professional account.
- Meta Business Suite: useful when you manage an Instagram account alongside a Facebook Page.
- PostQuickAI: use a content group when you also need drafts, a shared calendar or connected destinations on other networks.
Check Instagram’s scheduling help for current native eligibility. If you only need Instagram’s built-in scheduling, start there.
Connect the right Instagram account
In PostQuickAI, open the content group for the brand and connect Instagram. Check the account shown during authorization and grant the requested permissions. If Instagram is absent from the composer, go back to that group’s connections before preparing the schedule.
Write the post and add media
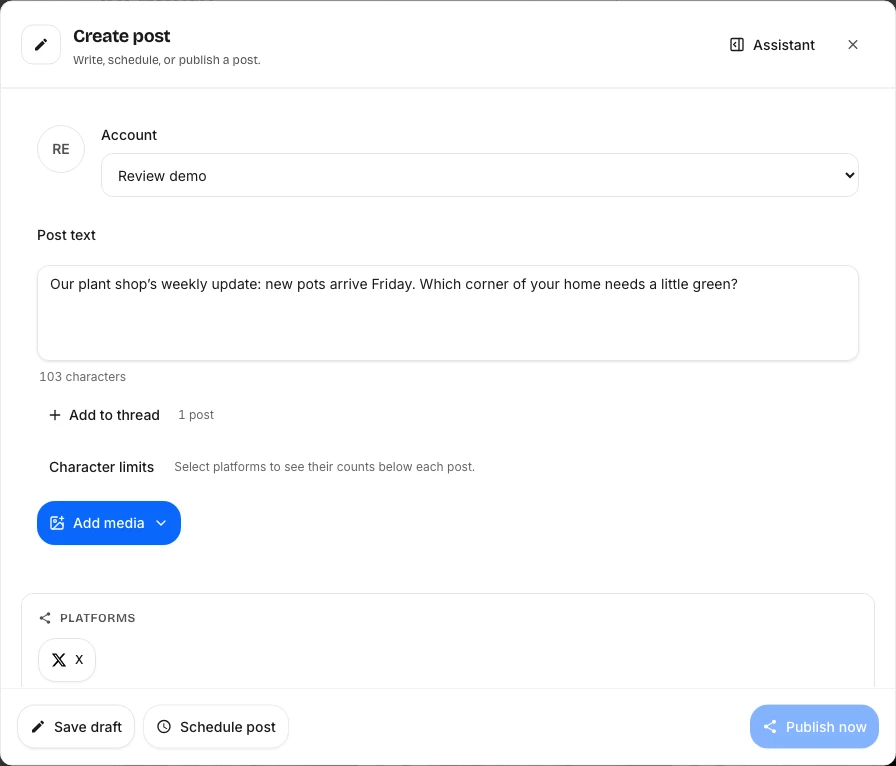
Choose Create → New post, select the group in Account and enter the caption. Choose Add media for an image. Use the dedicated carousel or video composer for those formats. Confirm that Instagram is selected under Platforms.
Set the time and review
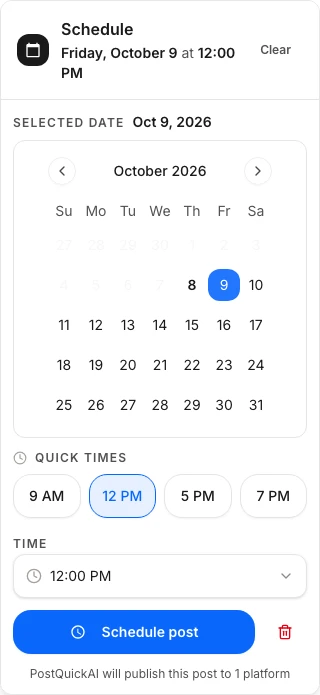
Choose Schedule post. Check the date, your browser’s local time zone, caption, media and destination before confirming. Save a draft if any of these are still undecided.
Check that it published
Look up the post after its scheduled time and inspect its status. If it failed, read the error and fix the account or media issue before retrying. For an existing problem, use the Instagram publishing troubleshooting guide.
For all platforms and post formats, see the full scheduling walkthrough. Compare paid plans if you need PostQuickAI’s workflow.